

Want to live your website on the internet which you have made on a local machine? Here I shared complete details to make the website live on the internet. Most developers know how to build websites using programming languages but don’t know how to live it on the web.
To make your website live three things needed: domain name (Google.com) ,hosting provider and website pages. For domain name, you can purchase it from top brands like NameCheap or Godaddy and for hosting you can use Hostinger, Bluehost and Hostgator to make your website live without any hassle.

Here are the complete steps to make the website live on the internet!
- Choose Good Domain Name
- Buy Good Web Hosting
- Link Your Domain to Hosting
- Upload Your Files
- Congratulation Your Website Went Live
1.Choose Good Domain Name
Domain name is an address through which your website is found by the people on the web. Choosing a good domain name is recommended because it helps to find and remember easily on the web.
According to what content you’ll put on your website, choose your domain name. for example if your website content is related to fitness then it can be fitnessguide.com,bestfitness.com and fitnesstraining.com etc.
How to choose a good domain name?
Keep It Short: your domain name should be short ,easy to type and easy to remember by people.
.Com Extension: Having domain with .com is considered a good and professional domain name.
Include Keywords (optional): If your domain included keyword then it helps in search engine optimisation (SEO) that ultimately leads to gain more conversion.
Where should I buy a domain name?
If you have decided your domain name, it’s time to purchase it from a popular domain seller website. The popular and oldest platforms to buy the domain are NameCheap ,GoDaddy.
2)Buy Good Web Hosting
Got your domain name? Now it’s time to buy some online space from a web hosting provider to place your website online and make it live 24/7 hours.
Basically, we purchase some storage to keep our website on the server. This server runs throughout the year that helps to live your website without any problem.
In making the website live on the internet good hosting is essential because website will be getting huge client request from different location so your website should load fast, provide 99% uptime and deliver content smoothly.
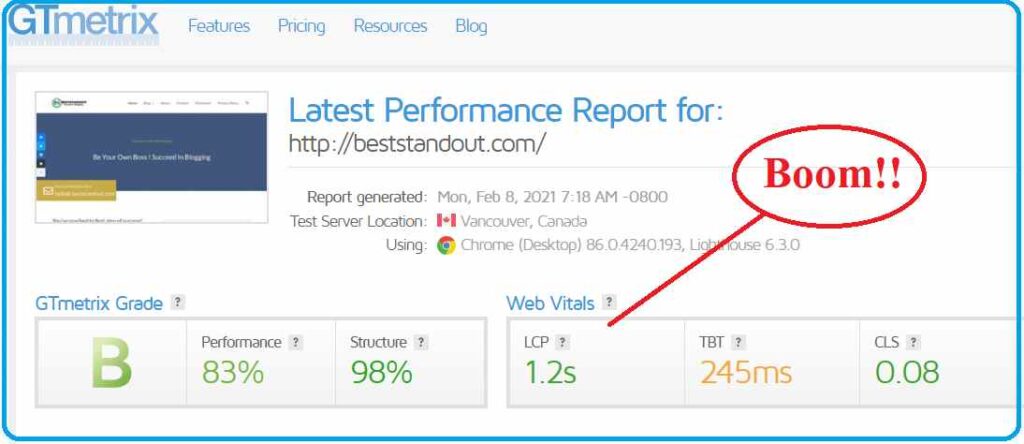
For hosting ,I recommend Hostinger for web hosting because it’s services are amazing and easily affordable. Don’t believe me, here is the Gtmetrix report of my website that says website loads within 1.2 seconds.
Steps To Buy Hosting From Hostinger
1.Use this link visit Hostinger website and scroll down to see its plan details
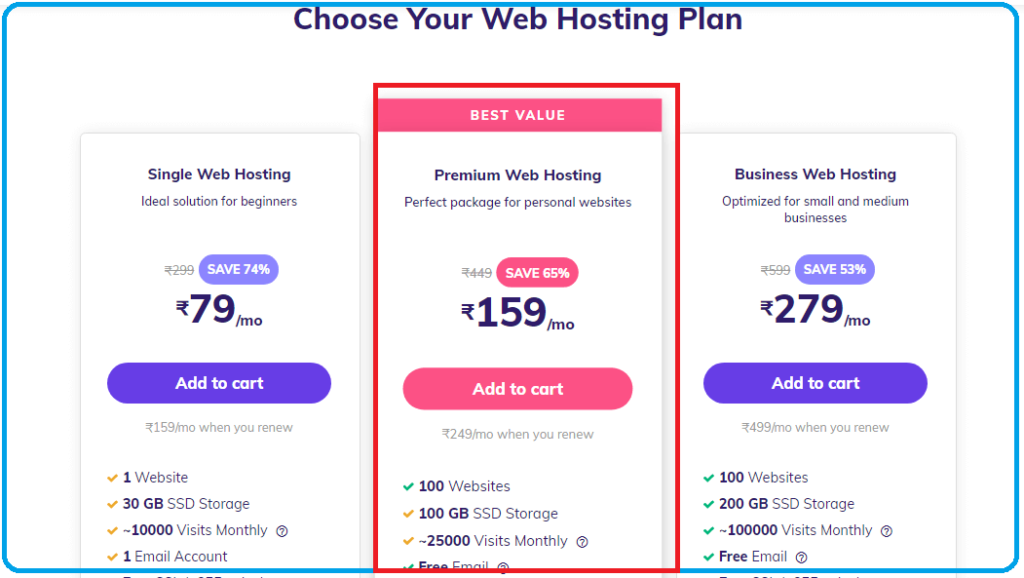
2. Select Premium Plan (recommended) : Select best plan according to your requirement, However premium plan is recommended because it includes 100 website hosting ,Free domain ,Unlimited Bandwidth, Free SSL and many more
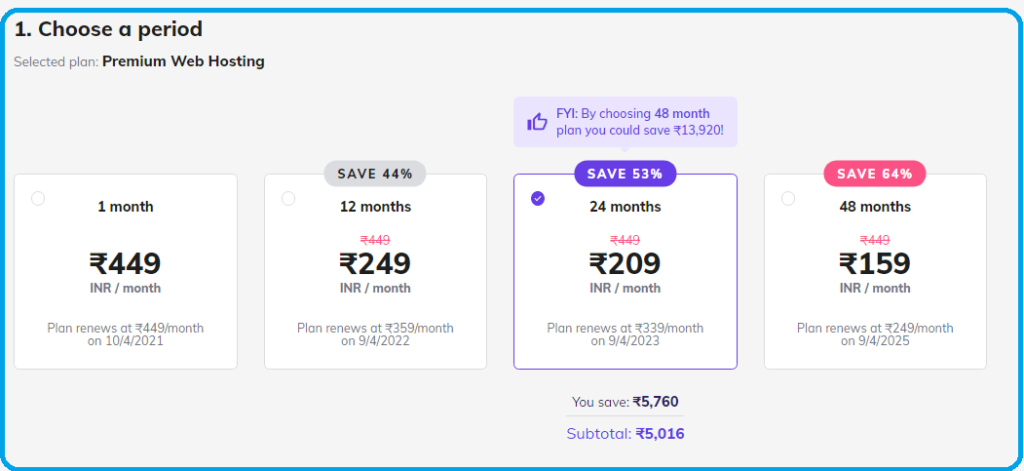
3.Select 24 Months To Grab More Discount: If you’re just beginner you must choose with 24 months period in every plan because you’ll get more feature & discount than 12 months period.
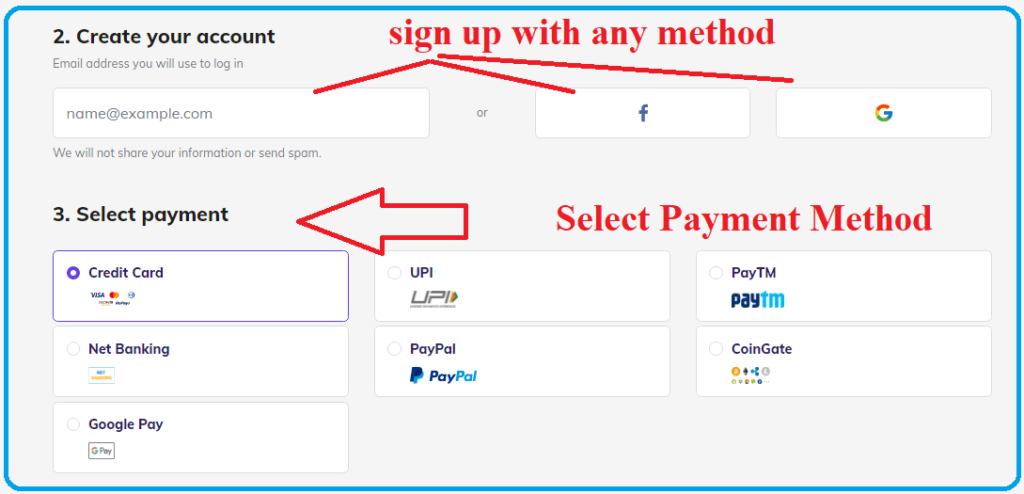
4.Fill the details & Checkout: Here you need signup with any given method(Email, Facebook and Google). After that select payment method ,Enter details carefully and complete the payment.
5. Congratulations, You have purchased the domain and Hosting or your website. Login into the account and follow the simple steps
3.Linking Your Domain To Hosting
If you have purchased the domain from NameCheap or GoDaddy then add this domain into your Hosting provider account and change the nameserver configuration.
Example: If you have taken domain from GoDaddy and hosting from Hostinger then Change the nameserver of GoDaddy with Hostinger nameserver from the DNS management.
Linking Godaddy Domain Into Hostinger Web Hosting
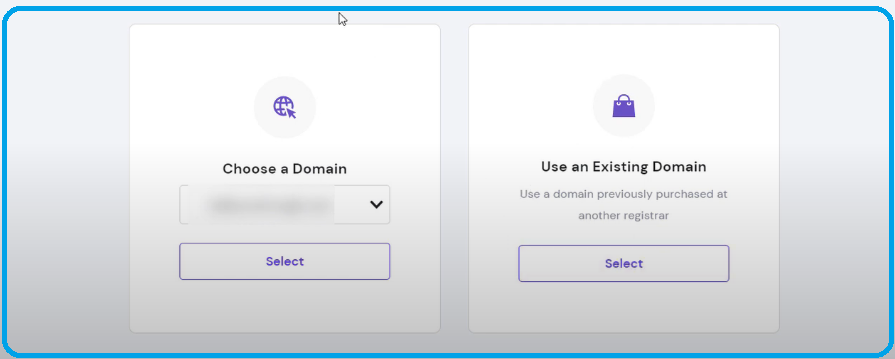
1.Login to your Hostinger account and click on setup button of your purchased plan.
2.Now there will be two choice use exiting domain or Choose a domain. Select use existing domain option and enter your domain name that you have purchased from Godaddy or any other site.
3.Enter Simple details and click on next steps
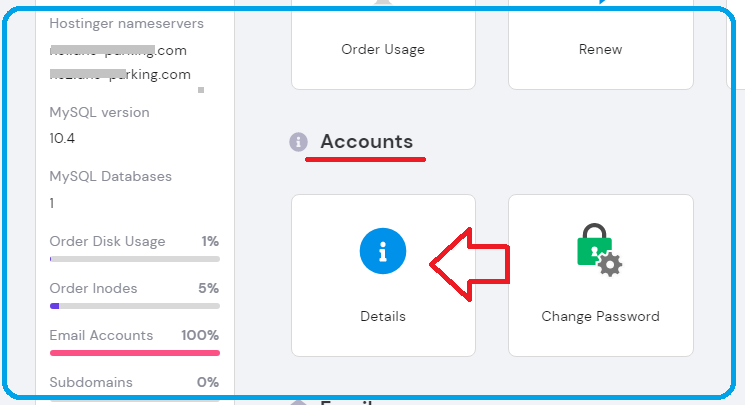
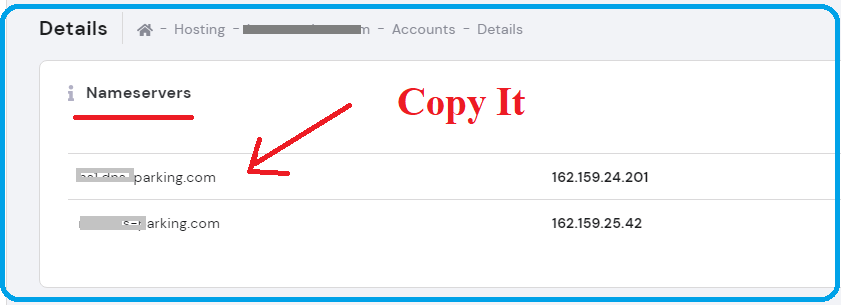
4.Find your nameserver from Hostinger->Account->Details and copy it into the notepad.
5.Now login to Godaddy account , find DNS management of your domain and click on Change Nameserver. Here you have to enter Hostinger nameserver that you copied into notepad. Save it and wait for a minutes to get reflected.
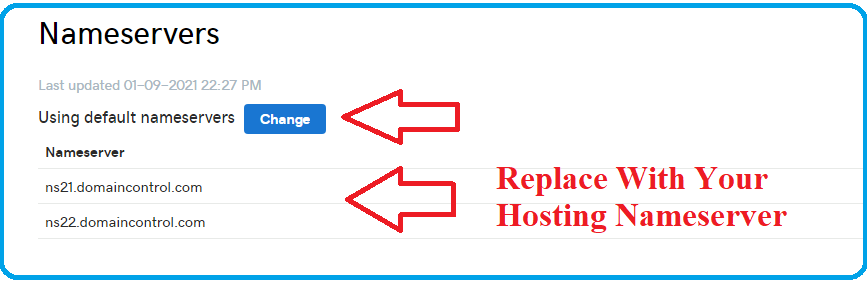
Now you successfully linked your Godaddy domain to Hostinger web hosting
Some of the hosting providers offer free domain names along with their hosting so you can use it if you haven’t purchased a domain from a third party.
4.Upload Your Files
Once you have added your domain into the Hosting account, it’s time to install the website. You can either build your own website pages and upload on your site or you can use CMS (content management system) like WordPress ,Joomla to build your site without coding.
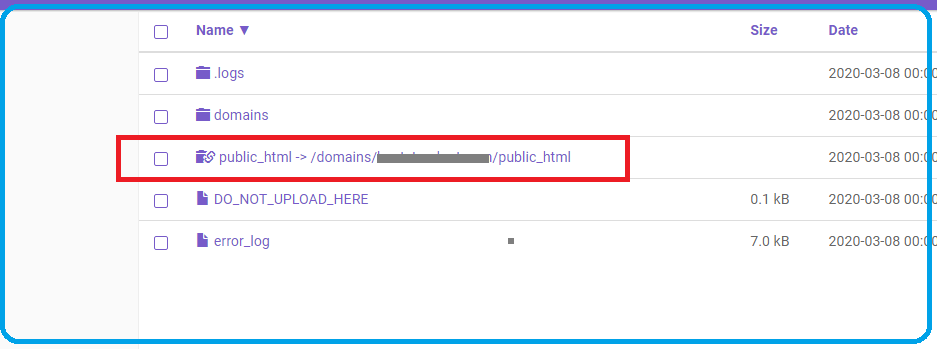
If you have build your website pages(html) and want to upload it then open the file manager from Cpanel.
Go to inside the public_html folder of your domain name(that you had added) and paste your website project (html files) here.
5.Congratulations Your Website Went Live
Congratulations, your website is live now. Visit www.yourdomain.extension to see your lived website. Now anyone who enters your website URL in browser he/she will redirected to your website.
Once this is done, you may also want to display your website in Google’s search result when people search it. To do that you must have to verify the property in Google search console.
You Might Be Interested In The following Post!
👉 32 Ways To Increase Website Traffic Instantly
👉 How To Write Great Blog Description To Get More Click
👉 3 Steps To Get Your Website Noticed On Google
👉 Best Black Friday Deals [Big Discount]
Conclusion Of Making Website Live On Internet
I hope you found this post useful, kindly share it with other to deploy more website on web and enhance the learning. If any points haven’t covered please tell us via comment. Happy website deployment.