
Do you want to create WordPress website like how I created my website with just $0.89? If yes, Good decision. To start your WordPress site only thing you have to do is read this post till the end and see the amazing result.
The biggest advantage of using WordPress is that it doesn’t require coding skills, this gives flexibility to create WordPress website by anyone.
We have made this post step by step so that you can easily create your own WordPress site without doing any mistake.
Here are the complete details to create fabulous WordPress site in just 4 Steps
Step1: Choose your Domain Name
Step2: Choose Good web hosting
Step3: install & Setup WordPress
Step4: Launch Your WordPress website
Step1:Choose your Domain Name
Choosing domain name is basically giving the name to your website, through which it navigated on web.
Providing name to website/blog is very easy, only thing you have to analyse the area of your content which you will be publishing on website.
If your niche talk about blogging then you website name can learnblogging.com or smartblogger.com etc.
If you want to start food blog, then your blog name can be kitchenguide.com,foodlover.com and many more. While choosing the domain name make sure it should short, easy to remember or if possible you can include keyword also.
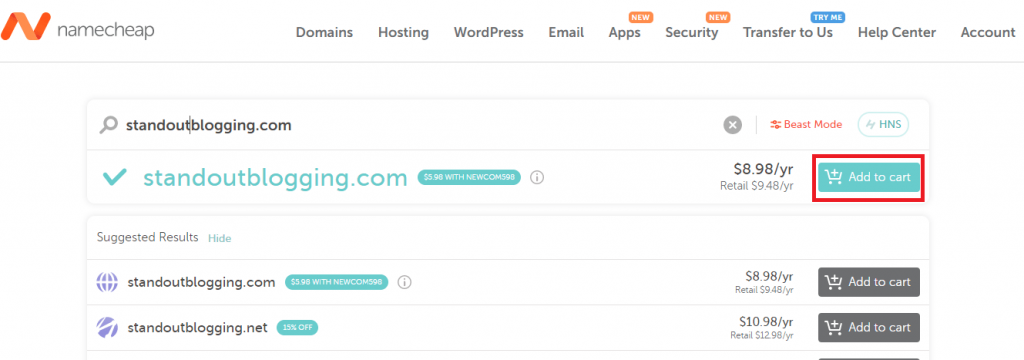
If you ask me, from where I get domain name, answer is Namecheap and GoDaddy. If you have already purchased domain you can skip this step.
Step2: Choose Good Web Hosting
Now it’s time to choose best webhosting that will make our site live on internet. Basically hosting service is used as a place to store our website files and database.
There are multiple hosting provider, among which Hostinger is one of the popular web hosting provider.
When I started my WordPress website with Hostinger my website started getting load within a second.
Don’t believe, see Gtmatrix report.
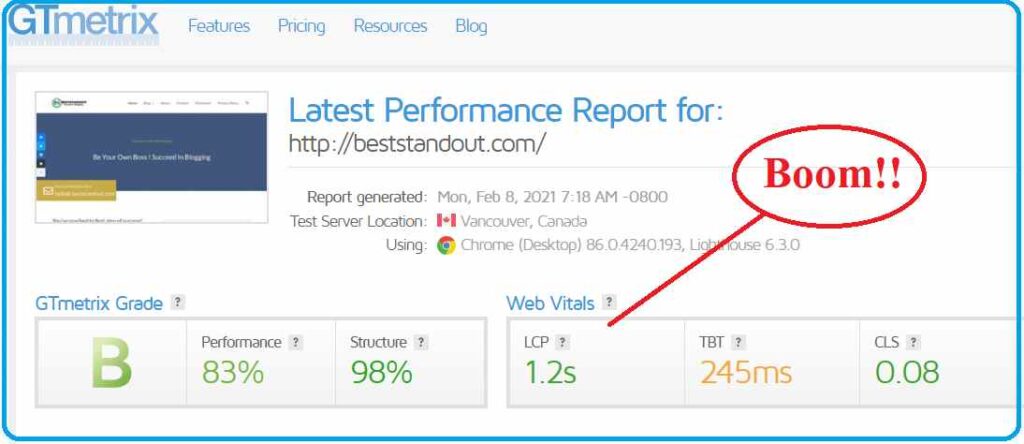
So if you also want to start WordPress blog, go with Hostinger ,they provide 99.9% uptime, good loading Speed with just 0.89$.
👉 Click here to grab the Discount.
Follow the simple step to get started with Hostinger to create wordpress website
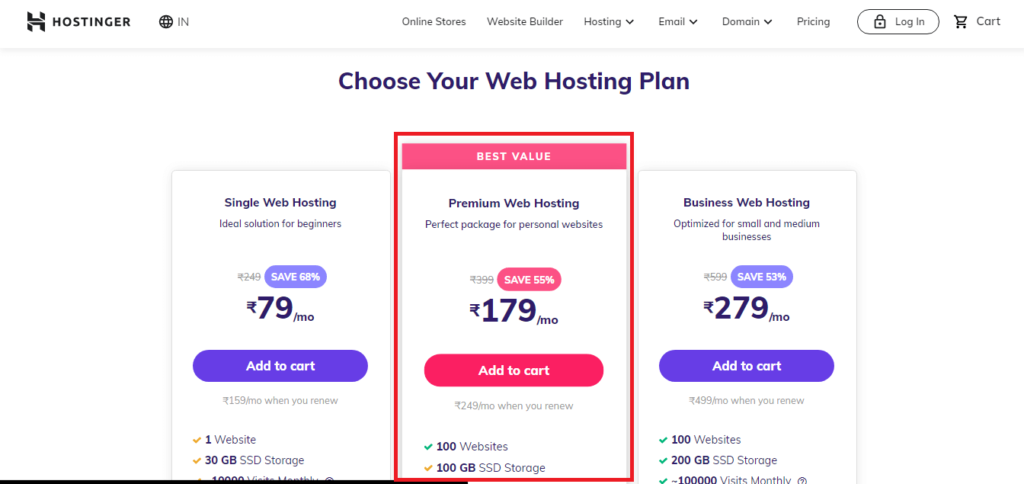
1. Click on this magic link and select recommend plan.
If you want to create a single WordPress website go with basic plan else you can continue with premium plan.
Recommend: premium plan.
Extra discount can be availed by using promocode: PREMIUM8. so don’t miss this offer
In premium plan you will get advance feature such as 100 website, free domain, unlimited bandwidth and many more. Choosing the best plan is most important while starting WordPress website because when your site starts grow it needs more bandwidth, big storage and many more.
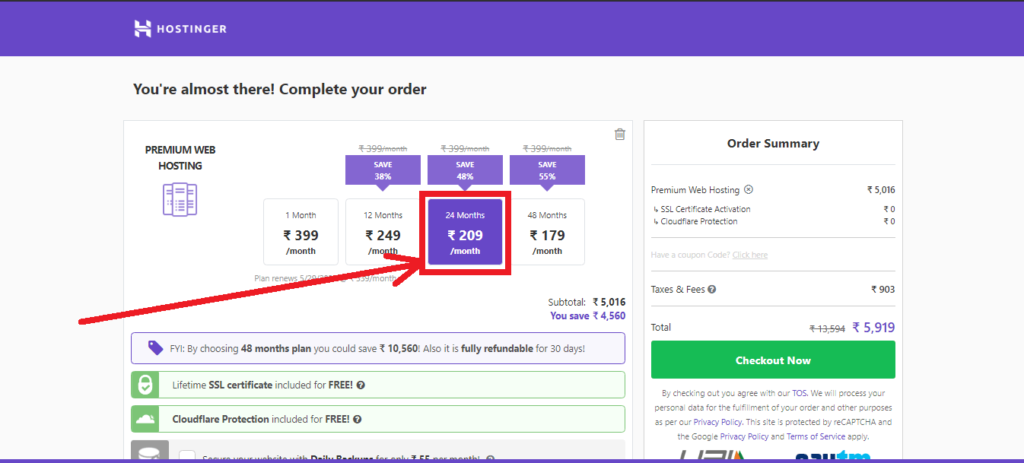
Recommended duration to take is 24 months, but if you want to grab more discount then choose 48 month plan.
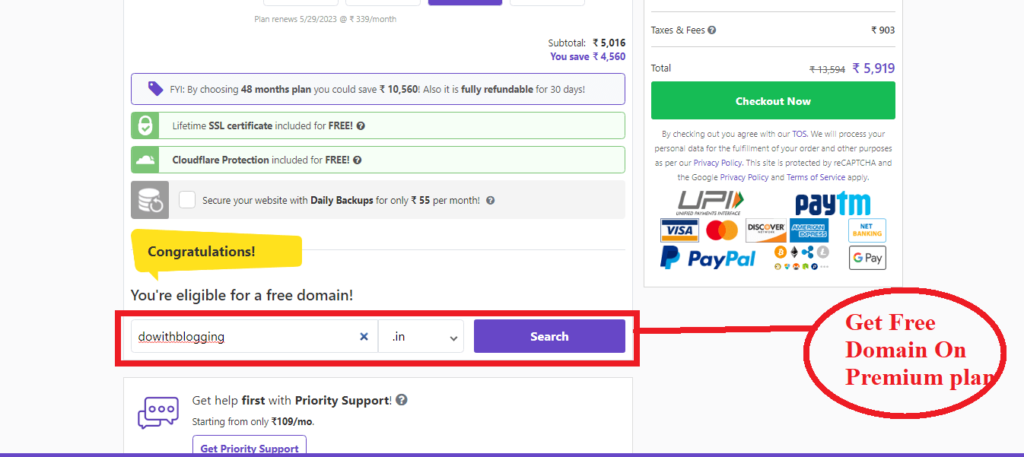
Hostinger provides free domain if you take premium plan, which you can easily setup if you take from Hostinger else you need to follow some extra steps when you take domain from Namecheap or Godaddy.
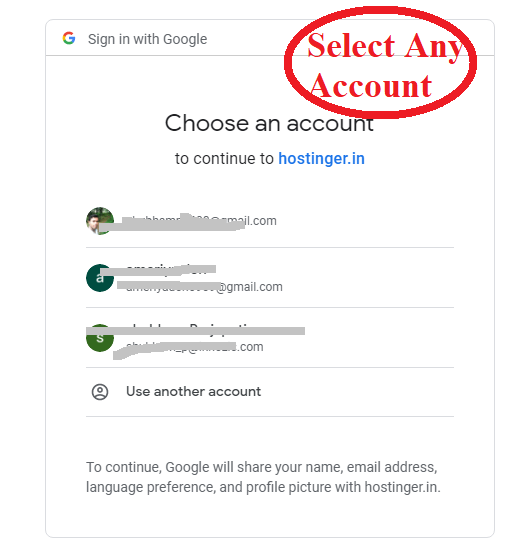
Now click on checkout button to proceed. Here you can easily setup the account on Hostinger just by clicking on Google ,Facebook icon or simply providing the name, email and password.
Remember if you choose second option(Name, Email, Password) then remember this password to login in future. Here I have used Google option to signup.
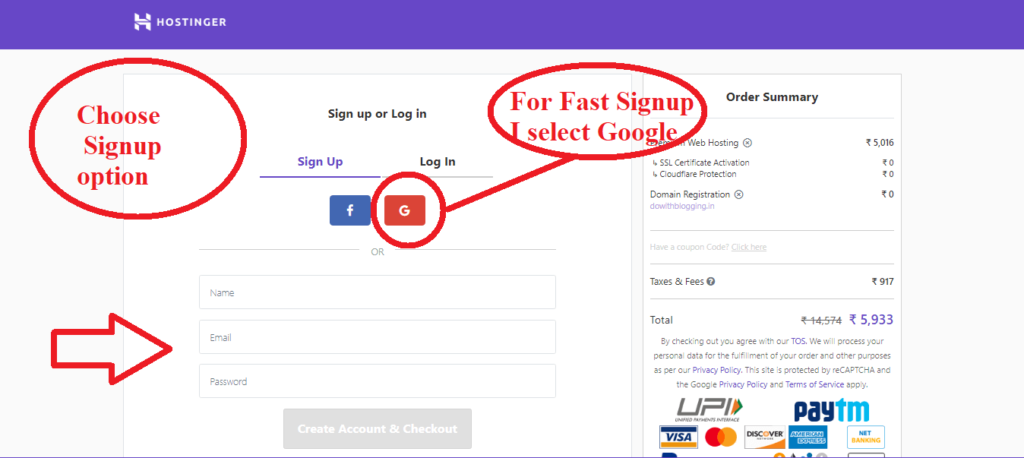
Select your Google account which you want to use it to open account on Hostinger if you have selected the Google icon.
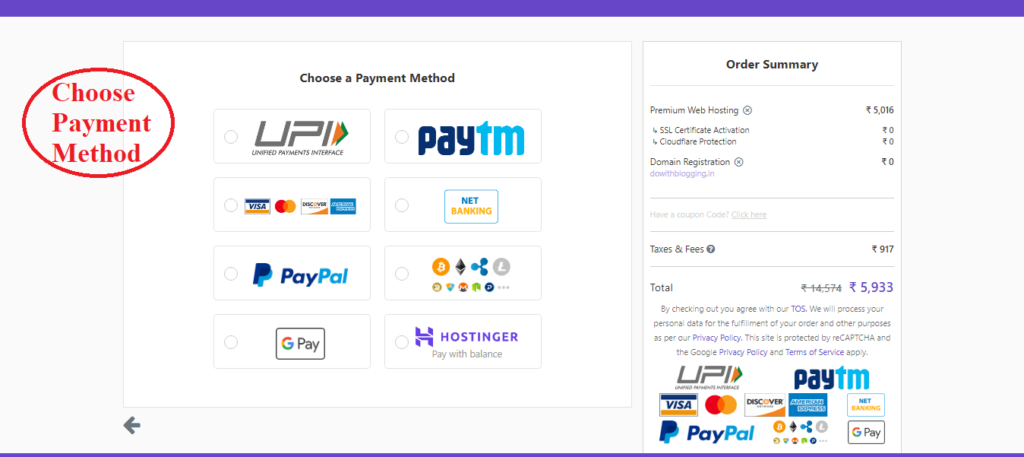
Now choose you convenient payment method and continue the process
Step3:Install & Setup WordPress
Congratulations ,You have purchased the hosting successfully.
Now, login to Hostinger account with google or simply using credential which you had created.
After login to dashboard ,you will get setup option for premium hosting and Domain setup(Which you got Free from hostinger). If you have taken basic plan ,then this option won’t be there.
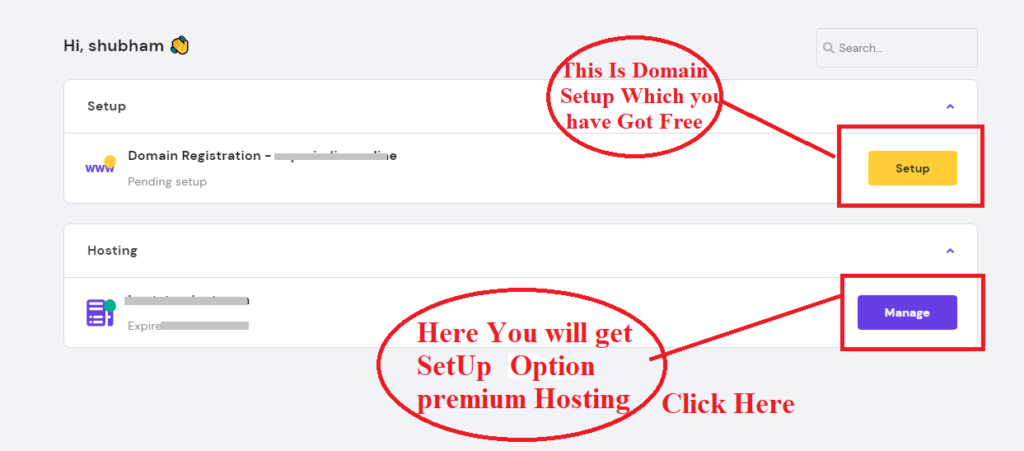
If you want to use this Free domain which you have recevied from Hostinger ,just click on setup button and follow the simple registration. In this case you don’t need to follow step of changing Nameserver with other registrar.
In most of the case, you might have got domain name from Namecheap or Godaddy then click on Premium hosting setup button.
When you click on premium hosting setup button, Click on start now! and you’ll get two option “Buy domain” and “Use an existing domain”. Use 2nd option if you have taken from other domain provider else you can buy new one.
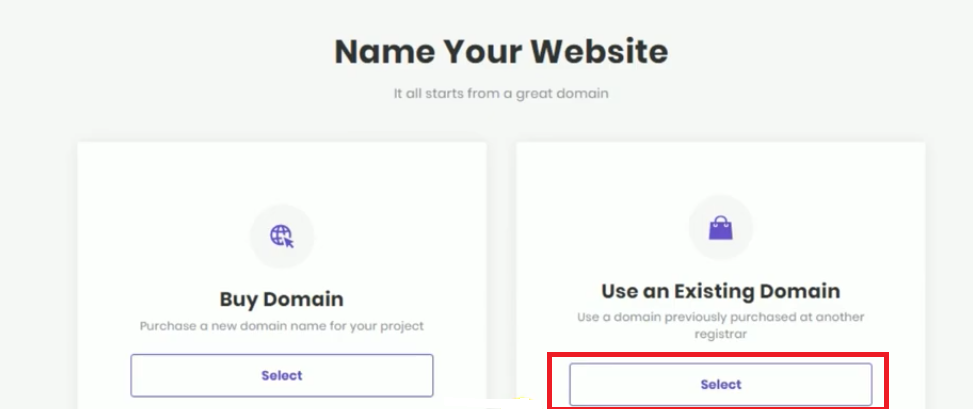
After entering the domain name you can finish the setup.
“Don’t forgot to change the nameserver. If you have taken domain from NameCheap, Godaddy or somewhere else”
Step To Connect GoDaddy Nameserver To Hostinger Nameserver
To access your website ,your domain name(xyz.com) should point to hostinger nameserver. you have to change the your Godaddy nameserver with hostinger nameserver.
How to find hostinger nameserver?
1.Login to hostinger dashboard
2.Click on manage of your hosting plan and find Account option
3.Copy name both the nameserver and paste it in notepad to use in further process.

Follow the below step to change the nameserver with copied nameserver
- Login to Godaddy and click on profile at top right corner
- Click on myproduct
- Select your domain and click on manage DNS

- Click on change and select I’ll use my own nameserver
- Paste those those nameserver here and click on save button
Step To Connect NameCheap Nameserver To Hostinger Nameserver
Sounds good. If you have taken domain from Namecheap.
To connect Namecheap domain to hostinger, login to your Namecheap account ,select you domain from domain list , as next step click on manage button of the domain you connect with hostinger.
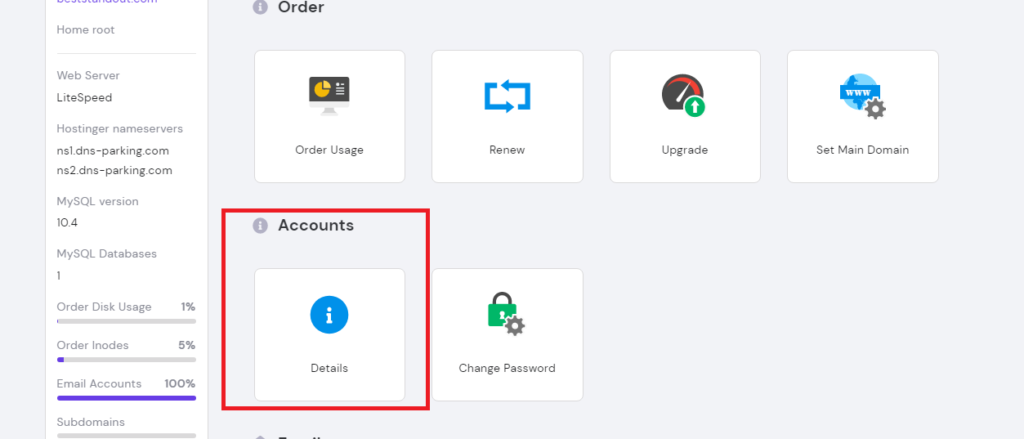
Now select the Custom DNS from Nameserver and enter the Hostinger nameserver here. You can find the hostinger nameserver from Account Details (See above snapshot).
For more information about namecheap domain to hostinger visit Namecheap.
Once this is done you can install the WordPress in single click from Hostinger Dashboard where you got the account option.
During WordPress installation you’ll create username and password for your WordPress site. These credential will be used in future to login WordPress Admin panel.
4.Launch Your Website
Congratulation, Now your website is ready. To get first look of your website type in URL like yourwebsitename.extension
To access WordPress admin page type in URL as yourdomainname.extension/wp-admin and hit enter. It will be asking for username and password to take you in WordPress admin panel.
Example: sitename.com/wp-admin
Kindly share it with other who also want to start fascinating WordPress website with just $0.89.
You might be interested in the following !!
👉 HostPapa Black Friday Deals [Host2 Website + Free Domain]
👉 32 + New Ways To Drive Instant Traffic To your Blog
👉 Google AdSense Questions You Must See To Get Fast Approval
FAQ: Creating WordPress Website
Can We Get The Good Web Hosting Under $1 ?
Yes! Hostinger is best and popular that offer web hosting under $1, so you can go with this when you want start wordpress site.
Should I Buy Domain From Hostinger or Somewhere Else?
Its’ totally depend you, if you are getting cheaper domain from other source ,you can select that but make sure it is authentic. you can check their review and feedback before proceeding.
Why Install WordPress On My Website?
WordPress is easy to manage because it doesn’t require coding so you can start with WordPress even if you are starting small business.