
Want to know how to get a free SSL certificate to secure your website and boost your website ranking on Google? Then go step by step of this article.
To ensure that you have enabled SSL, check the Lock icon in Address Bar(URL). If the lock screen is displayed, means your site is secure.
The visitor of your site trusts only if you have an SSL certificate enabled example: HTTP. To HTTPS. The Cloudflare website offers these features. There is various best Webhosting provider who renders the Free SSL Certificate and Domain name(.com,.in) and more.
When I implemented Cloudflare on my website, Along with SSL certificate my blog started loading much faster.
5 Easy Steps To Get Free SSL Certificate [CloudFlare]
Let’s Get Started to Get the Free SSL Certificate and secure your website to make it trustworthy for the people.
- Step1 Sign Up on Cloudflare For SSL
- Step2 Add Website To Cloudflare
- Step3 Modify Nameserver
- Step 4 Enable SSL Certificate
- Step 5: Install Cloudflare Plugin
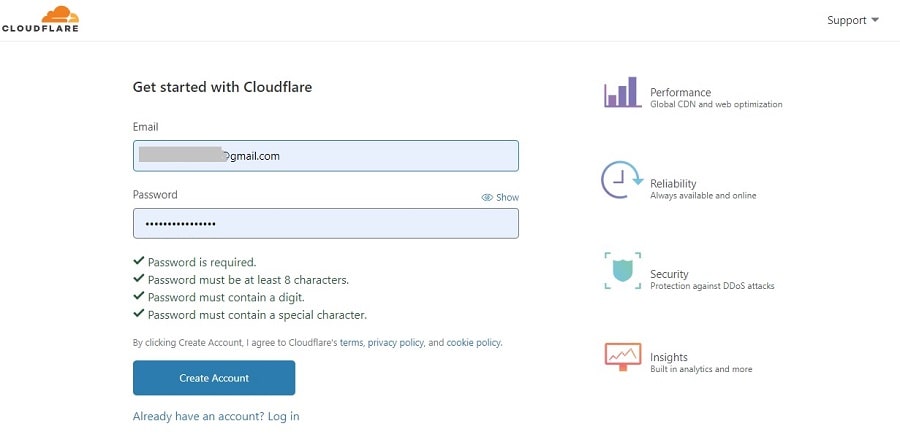
#Step1 Sign Up on Cloudflare For SSL
Visit Cloudflare and click on the signup button to create an account. just Enter Email and password to set up the configuration.
#Step2 Add Website To Cloudflare
Once signup you will be redirected to the page where you need to add your website to enable the SSL certificate. Just Enter yourwebsite.com. No Http or www.
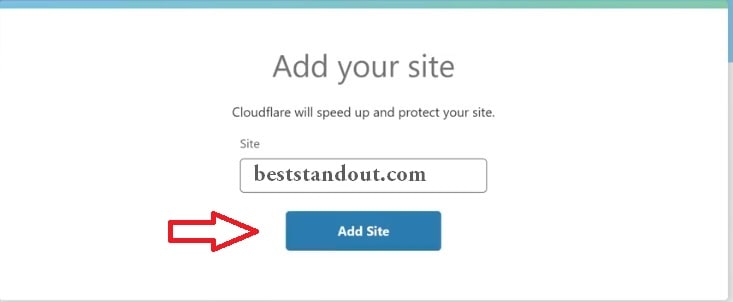
To proceed, click on the ADD site or Next button. Choose the free plan($0 per month) m to get the SSL certificate and click on the confirm plan button to move further.
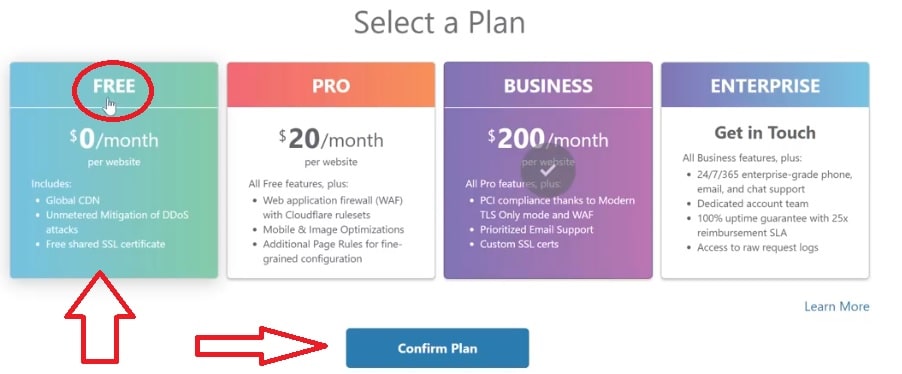
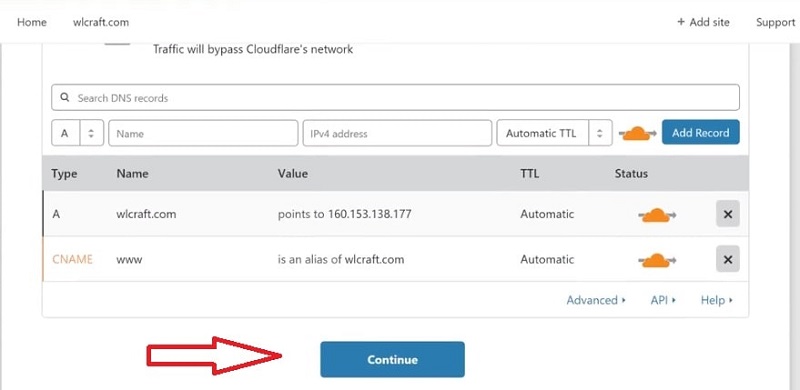
In the next phase, it shows the various DNS which include the CNAME and address pointing. Cloudflare recommends leaving it to default. The dark cloud sign indicates status whether it is active or not. Just click on Continue to set up the Nameserver.
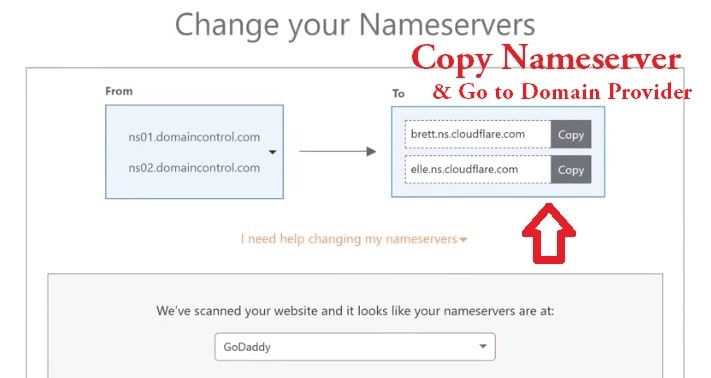
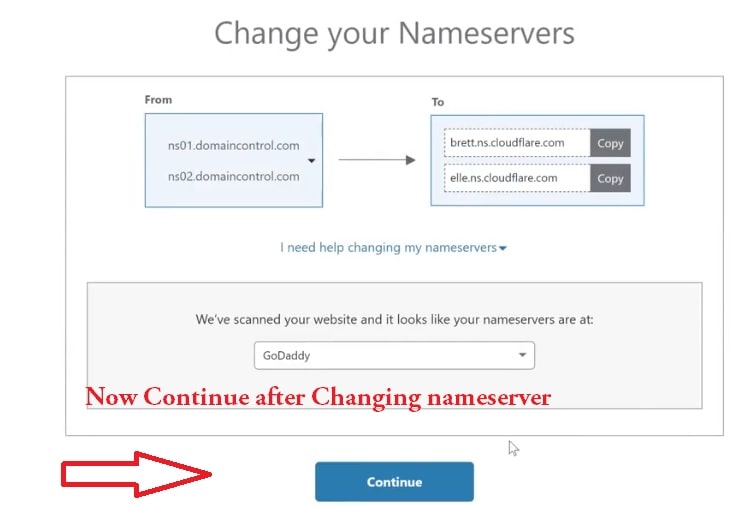
#Step3 Modify Nameserver
Nameserver is the name of the server on which your website is hosted. if you want to access your website through a particular domain then you need to do configuration in the domain Name System(DNS).
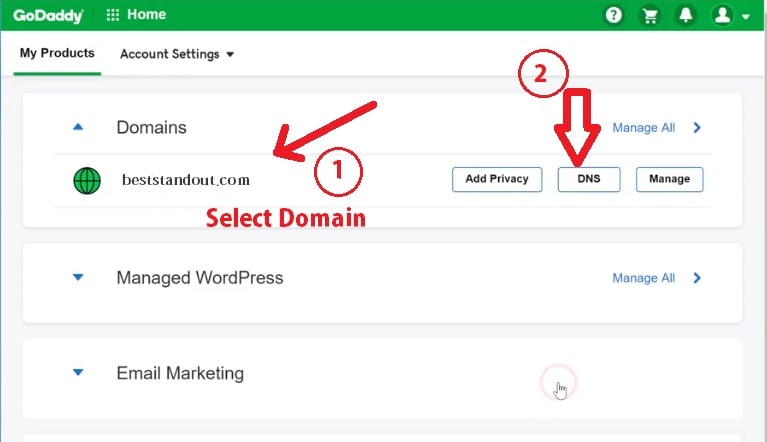
If you have Taken the domain from Godday or another domain provider then goto to the DNS management of your domain provider(Godaddy.com).
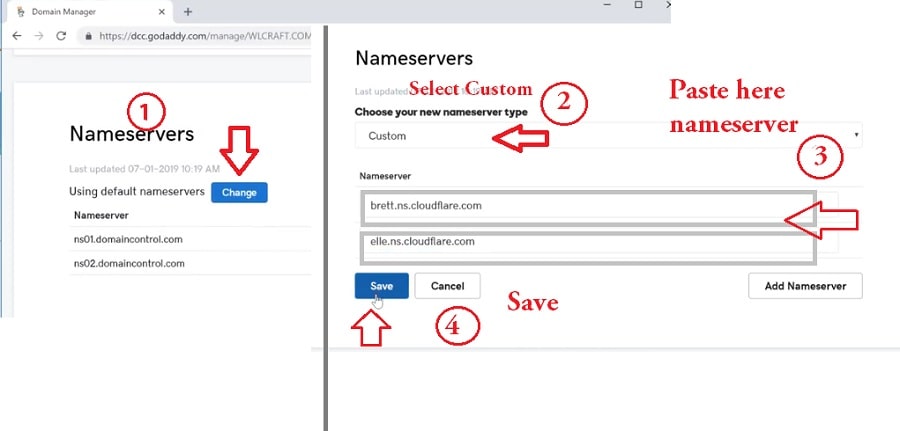
- Find NameServer in DNS management and
- choose a new nameserver type as Custome and Enter the Cloudflare nameserver so that your domain should point Cloudflare server to access the website.
- Click on Save button
If you changed the Nameserver got to the Cloudflare from where you copied the new name server and click on the continue button. In a Few Minutes, your Cloudflare will start pointing to your website to protect.
You can click on the recheck button to verify whether Cloudflare pointing or not.

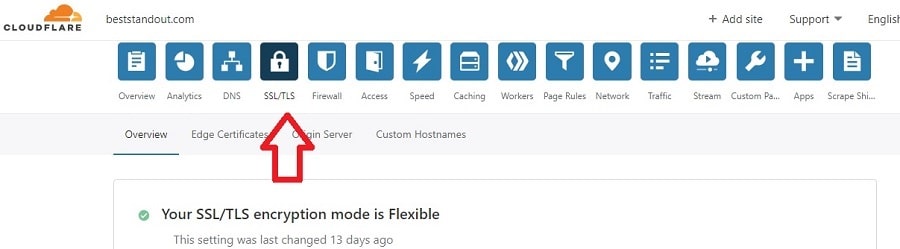
Step 4 Enable SSL Certificate
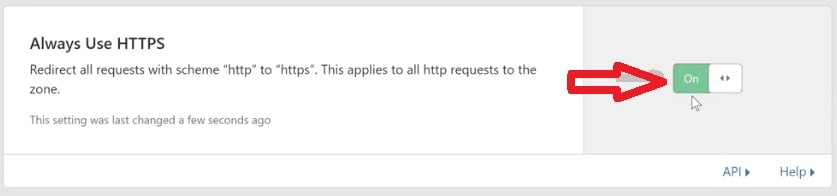
Once your nameserver pointing is done you can enable the Free SSL certificate. Click on the SSL/TLS icon and enable the Always use HTTPS Checkmark.
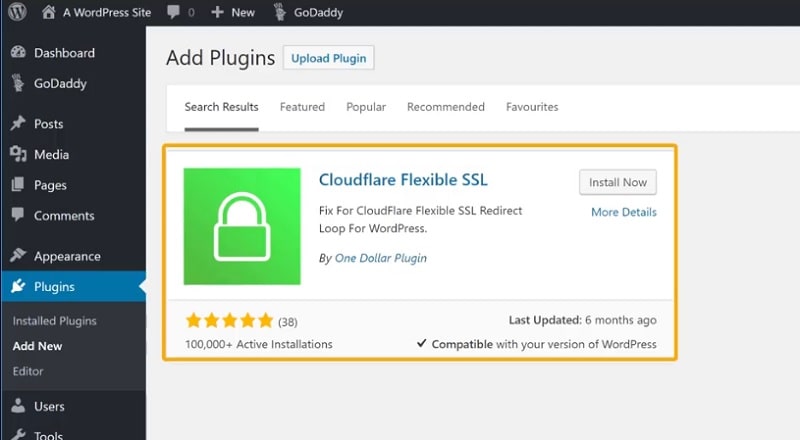
Step 5: Install Cloudflare Plugin
If you are enabling an SSL certificate on WordPress site then, go to the WordPress, Install Cloudflare Flexible SSL plugin and activate the plugin. See Other Powerful WordPress SEO plugin to rank your website on the google page.
Congratulation, Your website is now fully secured with HTTPS and much faster because of Cloudflare.
Conclusion Of Free SSL Certificate
I hope now you will be able to secure your website with HTTPS with the help of the Cloudflare Free Platform. You can do more with Cloudflare such as compressing the elements to load faster and more.
Hope you find this article useful!. Kindly share it with other to spread knowledge.