
Want to move your WordPress site to a new host or domain? The scary point is dealing with website’s data makes people like you fear data loss and website crash.
If you’re running a website, you may need to migrate or transfer your website to another hosting company in future because of several reasons. So you must know about basic way to backup, restore and move your website
In this post we have talked in detail about migration or cloning of WordPress website step by step.
You Can Read This Post If You Want To:
- Transfer WordPress Site From One Hosting To Other
- Clone WordPress Site To A New Domain On Same Hosting
- Move WordPress Site To Another Hosting Provider Without Using Plugin
Here is 6 easy steps to transfer your WordPress site into a new Host
- Step1: Backup Files And Database
- Step2:Add New Domain In Your Hosting
- Step3:Upload Backup Files In New Domain’s Public Html Folder
- Step4:Create New Database And Import Your Backup Database
- Step5:Change Configuration In WPConfig File
- Step6: Access Your New Website
Step1: Backup Files And Database
There can be a number of reasons for taking a backup of a website. Before doing any modification to a website we must keep a backup of websites that eventuate to restore the website and save lots of time.
In our case we are going to take backup of the website for migration or cloning content of the old website to the new website.
Login to the file manager of your old website (site1.com) and get inside lt’s public_html folder. Select all files and click on compress to make it zip file.
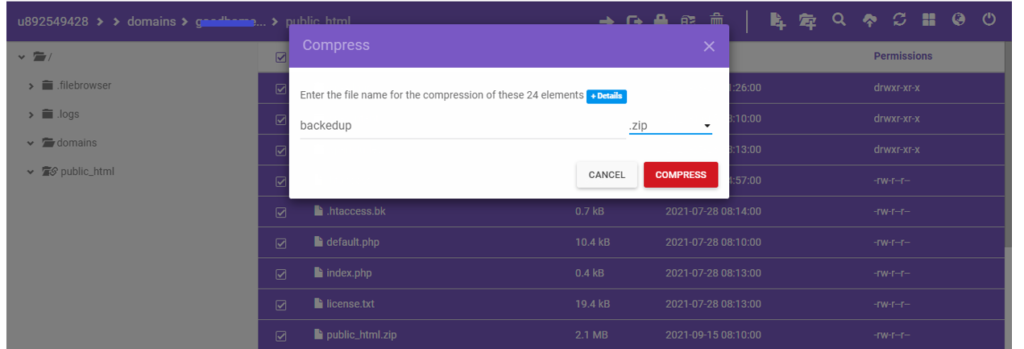
Depending on the number of files and its size it may take some time so keep patience till zip file creation. Once ZIP file ready ,download it and remember its location
Well done, if you have reached till here. To take backup of the database ,go to My Database from your file manager, select your website’s database and open it using phpmyadmin, Find export menu and click on it.

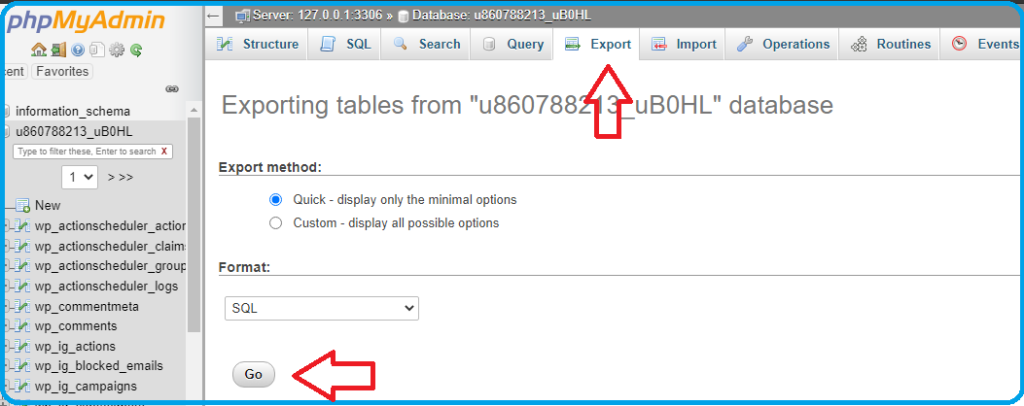
You’ll see the Go button on the bottom of the screen, on which you have to click to download your database file. This SQL file we’ll be using on our new website so remember it’s location.
Step2:Add New Domain In Your Hosting
Got your new domain (site2.com) from Namecheap or Godaddy? To work this domain for your website, you have to add this domain on your hosting so that you can upload the files in it’s public_html folder which we had backed up in the previous step.
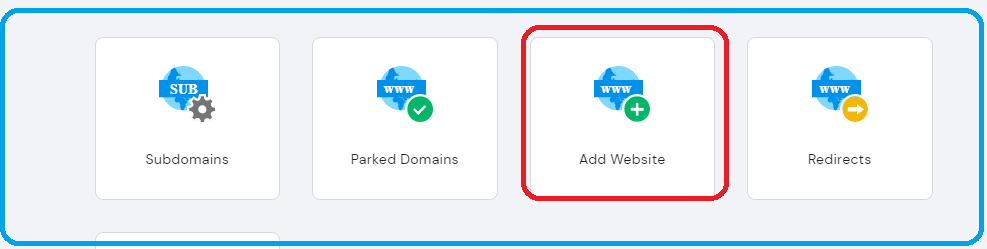
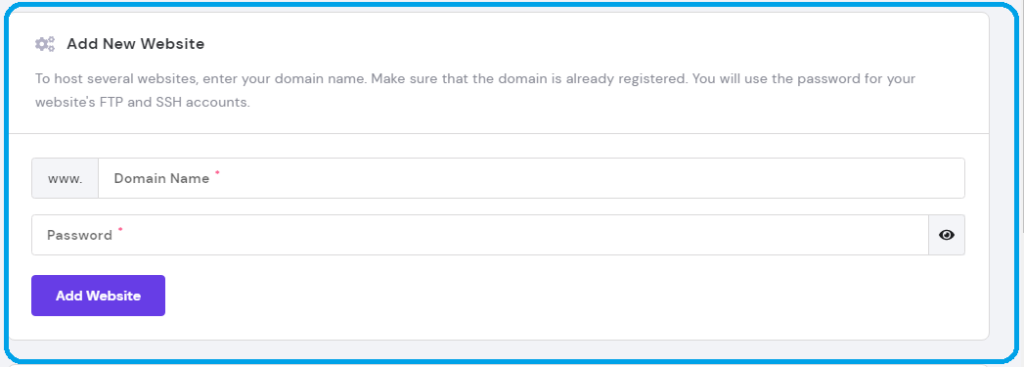
Once you successfully add the new domain (site2.com), its public_html folder will be created in the file manager.
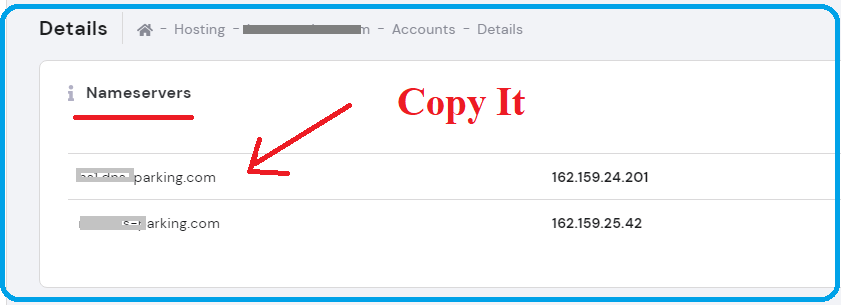
You might be receiving messages like Your Domain Is Not Pointing To Host. if you have taken your new domain from another website like NameCheap ,GoDaddy then nameserver configuration needs to be changed.
Recommended To Read: Suppose I have taken domain name from GoDaddy and hosting from Hostinger so what I’ll do is that I’ll copy the nameserver of Hostinger and go on GoDaddy DNS management of my new domain and paste Hostinger’s nameserver. Don’t forget to save changes. So whenever you type in URL www.yourdomain.com ,it will redirect to Hostinger’s nameserver instead of GoDaddy’s nameserver.
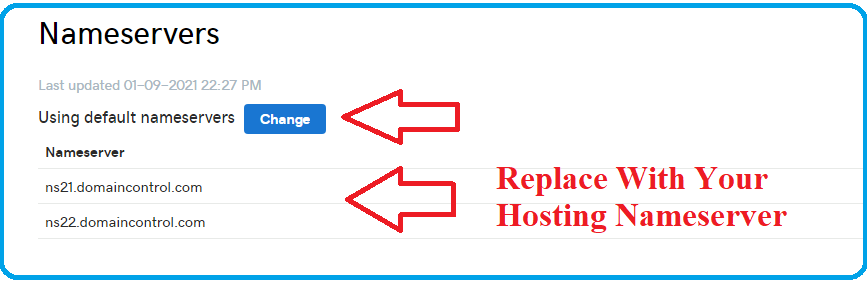
If you have taken domain and hosting from the same service provider then you don’t need to change the Nameserver configuration.
Step3:Upload Backup Files In New Domain’s Public Html Folder
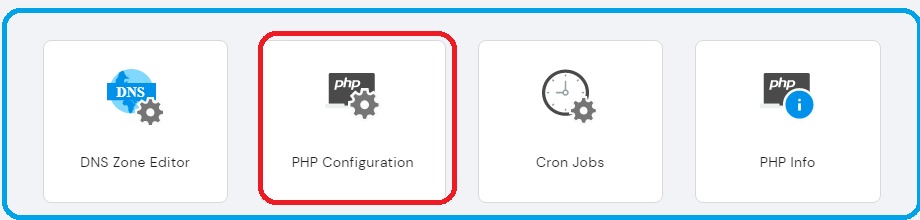
Before uploading files ,make sure you have the same php version configured in new domain as in the older site. This is essential because some of the plugins may not work if you install different php version in your new site. You can check your php version from the php configuration of cPanel. If it is not the same then change the php version else leave it.
Now there are two ways to upload files in public_html folder of new site:
- File Manager
- FileZilla (Recommended)
Steps to upload files using FileManager
- Login to cPanel and open file manager of your new site.
- Go to public_html folder of your new domain
- Click on the upload icon ,select the zip file that you have backed up and click on upload.
- Wait for some time till uploading of zip file
- Extract the file content by right click on it or from menu
FileZilla is most widely used to upload files because it provides live uploading status which helps the user to know which file upload successfully and which failed.
Here is the steps to upload files using FileZilla Tool
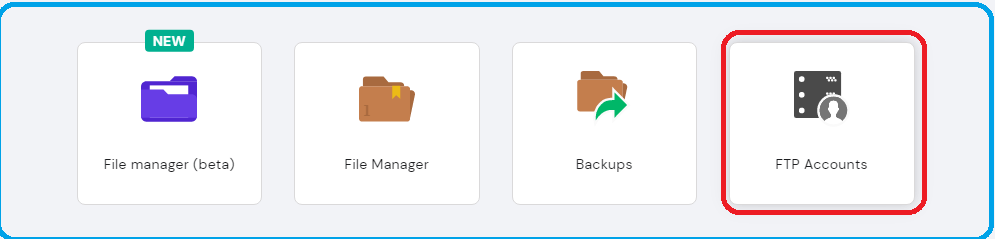
Login to cPanel and click on FTP (file transfer protocol)
Note your credential, If you don’t remember the password ,reset or change it
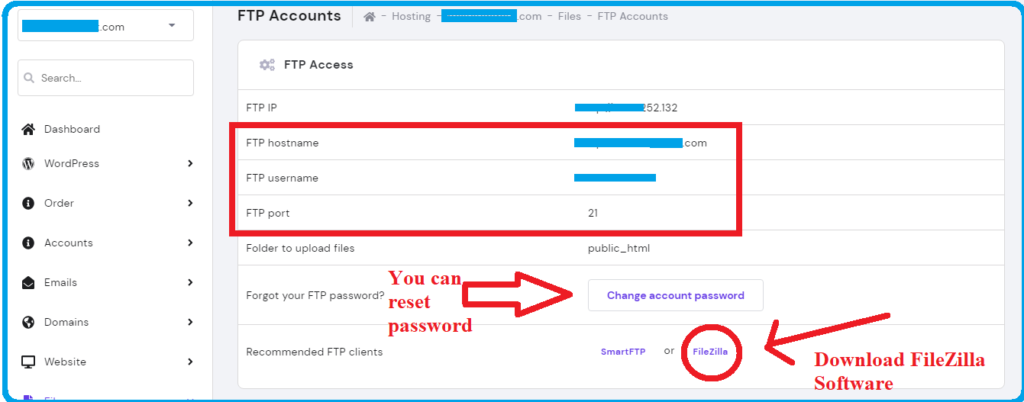
Download FileZilla On Your System
Click on Add site icon at top left corner, again click on new site button, Name your website
Enter FTP Credential such as Host, username, password ,port and finally click on connect button to get into file system of your website.
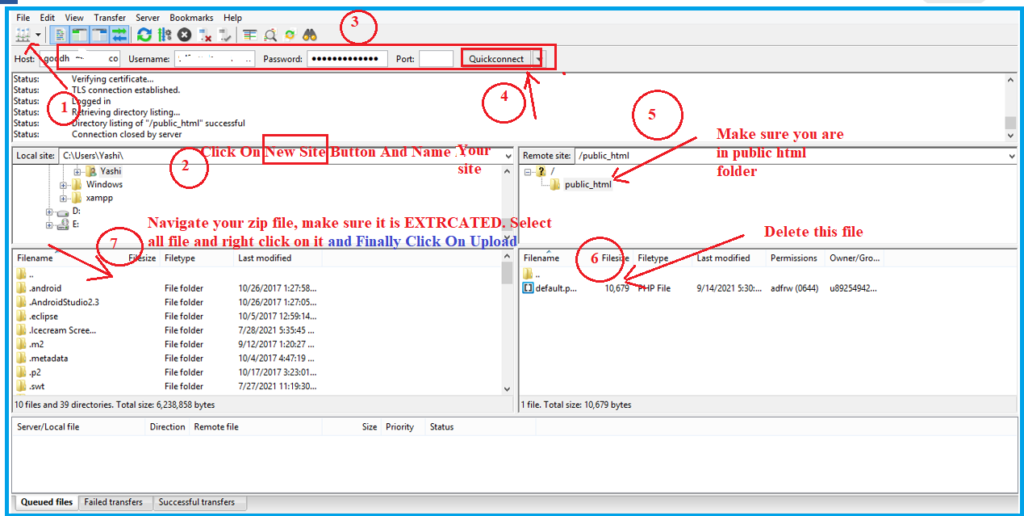
Uploading Files In Public_html of your new domain folder
Step4:Create New Database And Import Your Backup Database
After uploading files, you have to create a new database and upload your database file that you have backed up.
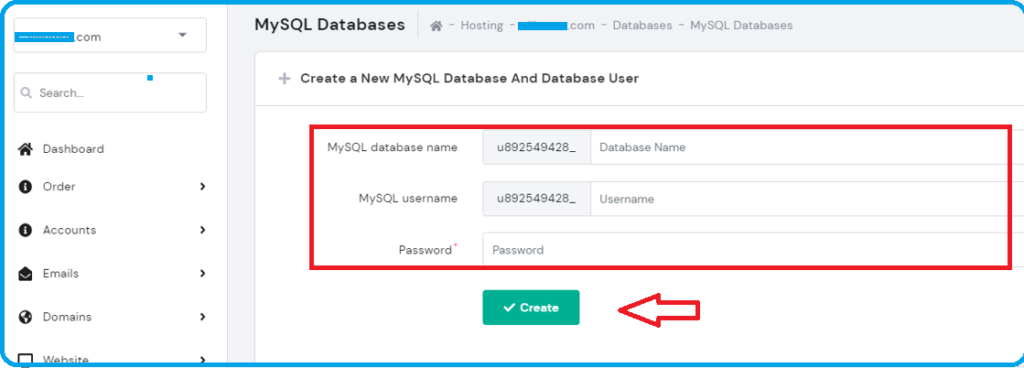
Login to cPanel of new site and find MySql DB
Enter Database Name, Database UserName, Password and click on create button
Open phpmyadmin panel and go to import menu
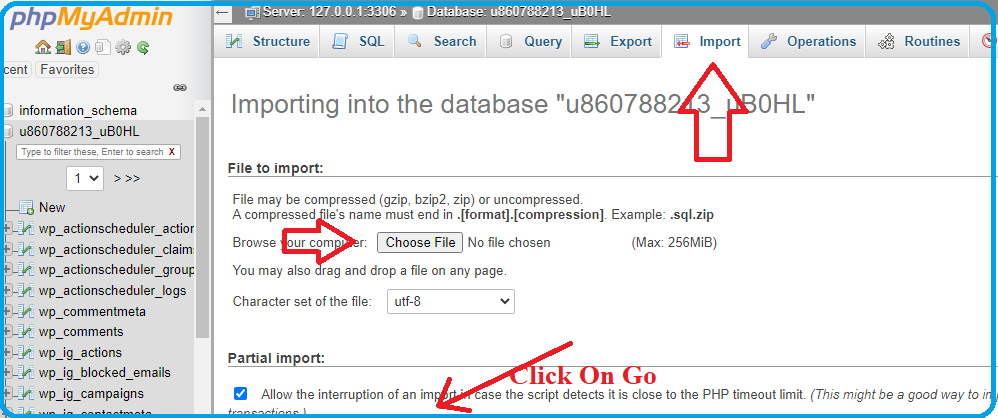
Select sql file by clicking on choose file button and click on Go button
Congratulations, your files and database are successfully uploaded. Move to next step
Step5:Change Configuration In WPConfig File
Once files and database are successfully uploaded we need to modify the WPConfig.php file. Login to cPanel of new site ,open file manager, go to public_html folder of new domain (site2.com).
Find WPConfig.php file and edit the following details according to your database
- DBname
- DBuser
- DBpassword

Step6: Access Your New Website
Congratulations, you old site is migrated or cloned to a new website. Wait for few minutes to get fully reflected .To access your new website type www.yournewdomain.com